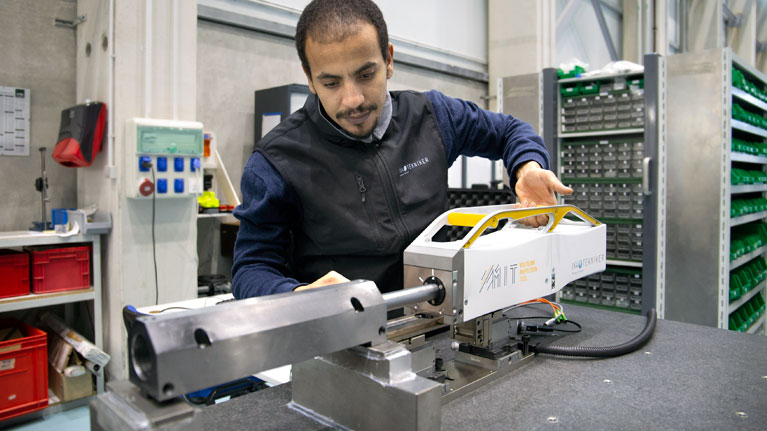
How to inspect equipment with a micro margin of error 25 times thinner an A4 page?
Tekniker and the European organism F4E (Fusion For Energy) have developed a multi-link inspection tool for the ITER device, the world’s largest experiment in the field of fusion energy.

To manufacture the various ITER components, engineers around the world need to think out of the box. Quite often they may have to develop tooling from scratch because it may not be readily available in the market to test components during fabrication. ITER is not only creating a direct demand for industry and laboratories to put all their talent to producing its components. It is also pushing those involved to go beyond the state of art and to transfer their know-how to new applications.
This is exactly what happened when experts working in the field of In-Vessel components, the equipment that will be exposed to super-hot plasma of the ITER device, started searching for tools in the market to take measurements of a specific part of the Divertor Cassette Body. ITER will require 54 of these cassettes, which will be installed on the bottom of the chamber covering an area of 142m2, to form a large “ashtray” where the impurities of the fusion reaction will be diverted. Each of these cassettes measures 0.8 x 2.3 x 3.5 m and weighs roughly 8 t with all components installed. What experts wanted to measure was the diameter of the multi-links— the cylindrical hinges connecting the plasma-facing components to the Cassette Body itself.
A groundbreaking piece of metrology equipment
They started by conducting a market survey which concluded that there was no equipment available to perform the task considering the 20 microns of tolerance to be assessed—we are talking a 0.004 mm margin of error which is 25 times thinner an A4 page! As a result, F4E (Fusion for Energy) launched a call for tender and after 18 months a brand new inspection tool, fully tested, was ready. Tekniker has developed the tooling with F4E and the result has been a groundbreaking piece of metrology equipment satisfying not only the needs of the In-Vessel components but also of others in the market.
We spoke to Gabriele D’ Amico, F4E Technical Officer following the design and manufacturing, to understand the nature of this important achievement. “We have developed a tool which allows us to take measurements precisely and quickly. We can perform this task in hours whereas before it took us days. The time savings are impressive. When we were faced with this metrology challenge without any adequate tools in the market we stumbled upon a real constraint. The only way out was to develop our own tool and this is where we are now,” he explains. So what is in store for the Multi-link inspection tool? It will be used to take measurements of the real components undergoing fabrication. “We took a risk and it paid off” he concludes. The win-win partnership with Tekniker is highlighted in the words of Fernando Egaña, Head of Tekniker Mechanical Engineering Department. “This has been a very successful project which has improved the capabilities and knowledge of Tekniker developing high precision mechatronic systems, especially measurement devices. In addition, through this collaboration with F4E we have been given the opportunity to contribute to ITER, the world’s largest experiment in the field of fusion energy.”
